|
Projects | Guides | Gallery | Articles | Contact |

|
Work Log Page: [1] - [2] - [3] - [4] - [5] - [6] - [7] - [8] - [9]
I started ordering the watercooloing parts. Here's what's coming so far...
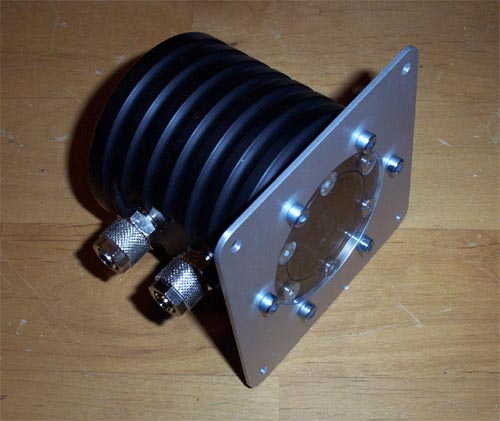
Innovatek innovaRadi-D Price: $99.95 I only ordered the parts I would need to fit in and finish work on the torso and still need tubing and blocks for the CPU and GPU. The Fass-o-Matic reservoir arrived today, it was a little smaller than I had envisioned but no big deal.
Wasting no time I found the best placement and marked the position for the Fass, I then lined up the the center and drilled a pilot hole.
I used an 80mm hole saw bit on my trusty Black&Decker corded drill to rip a hole, the drill seized up a few times when the hole saw would catch up in the cooling plastic... it was a bit jumpy and twice I thought the drill had died.
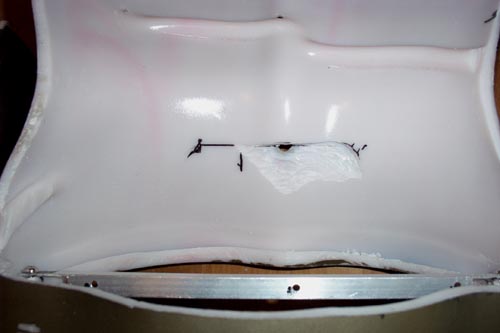
Fass-o-Matic reservoir + 80mm hole = perfect fit.
12/14/2004 Update... The Mod Progresses. I decided to concentrate on the chest section and get some stuff done before moving onto the
Here it is drying, I still have to fill in around the LCD cutout.
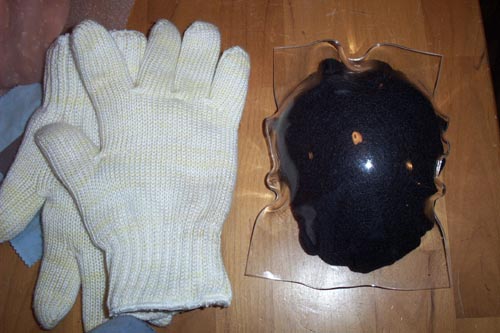
While it dries I figured I could make the window for the top of the head, Ove gloves rock.
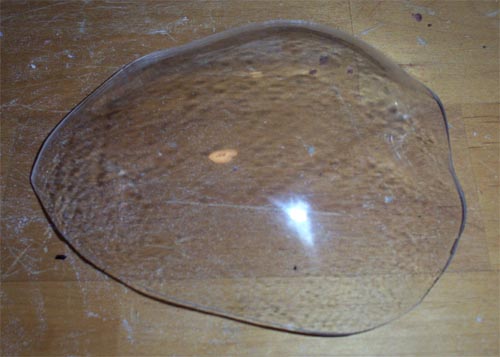
And here it is cut out and waiting to be sculpted onto the head.
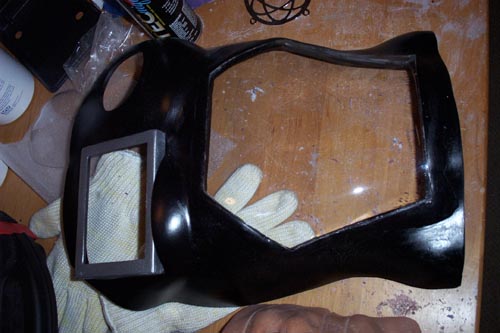
Below is the finished abdomen window, I hit it with the vinyl dye again to match everything up. I decided to vinyl dye it black to hide any imperfections when I start covering it in leather.
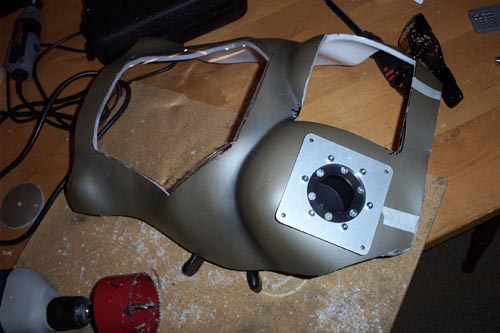
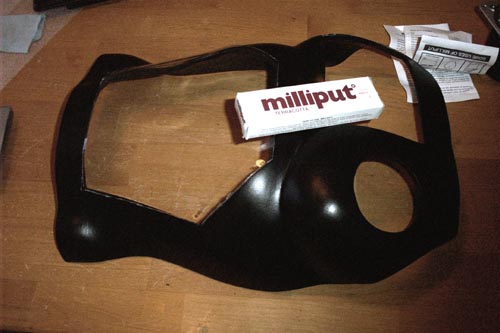
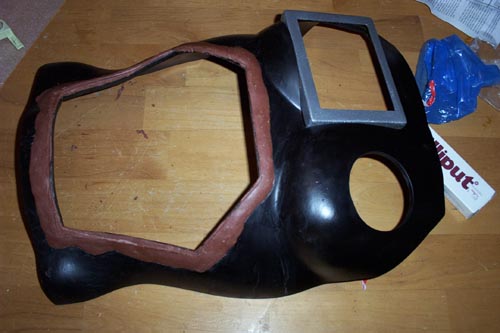
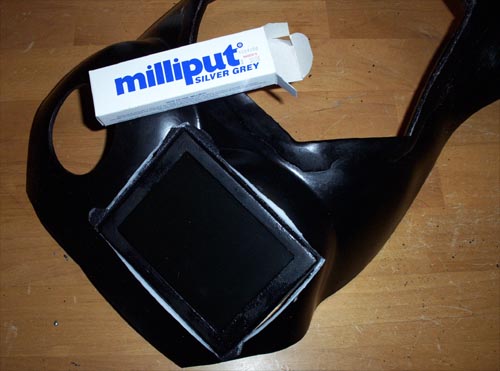
12/18/2004 Update... Sculpting fun. All the hardware has been ordered, I still have to order the lighting mods but while I wait I decided to finish up the chest. I used terra cotta Milliput for the window edging and it turned out great, I decided to try out the silver gray Milliput I bought for the LCD housing. I used an LCD visor mount kit and cut it to size and fit it into the cutout in preparation for sculpting over it.
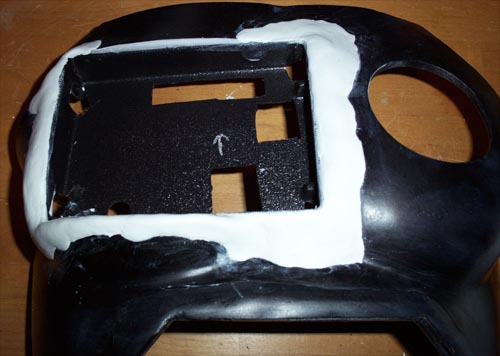
I filled in all the areas around the visor mount and built it up onto the chest so that everything was securely in place, then I used a little water to smooth it out.
12/19/2004 Update... Abdomen magic After the Milliput was completely dry I hit the abdomen section with another coat of black vinyl dye.
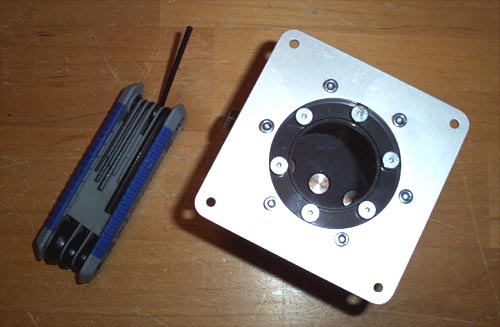
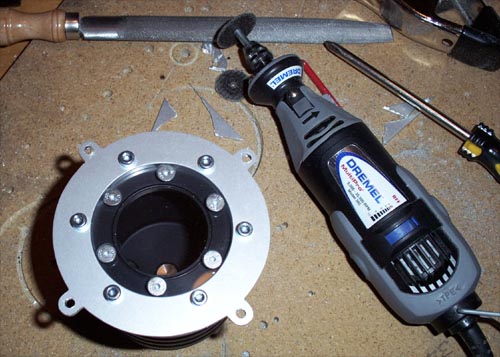
While everything dries I will disassemble the Fass-o-Matic
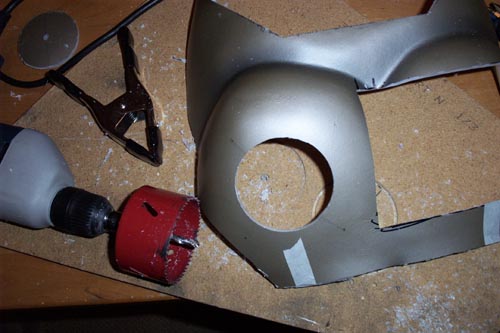
After an hour and a half of cutting, drilling and filing the modded cover plate is finally finished.
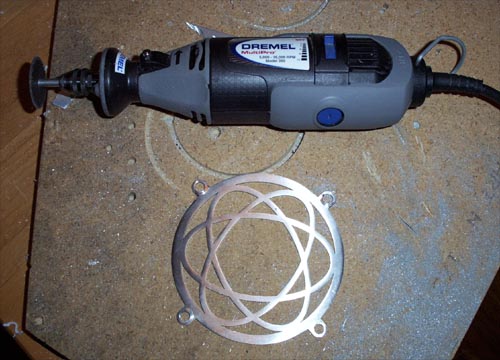
Next to take an atomic grill and cut it down to make a border for the outside of the reservoir cutout.
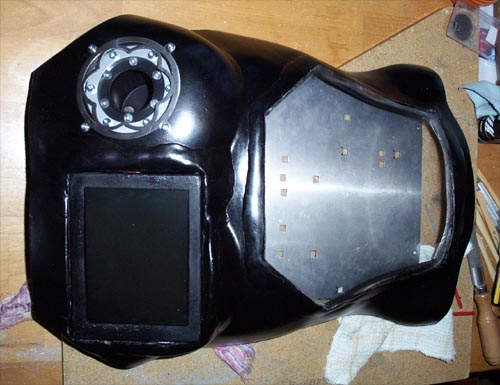
The vinyl dye is good and dry, so now it's time to test fit the LCD and reservoir. everything fits and I think it looks pretty good, once I get it wrapped in leather it will look awesome.
I also super glued the window in place which was a nightmare but wound up being ok in the end, below is a picture of the almost finished abdomen section.
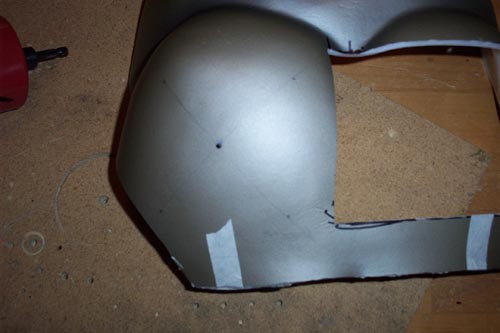
Next I will move to making the head and the picture below shows my choice of material for it.
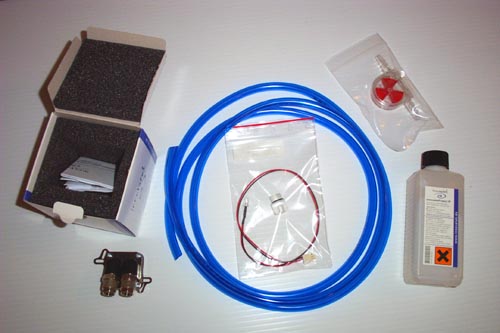
12/28/2004 Update... Parts and Waiting for Parts. More parts have come in for my mod, the holidays kind of slowed things up a bit but the mod will ramping back up here in the next couple of days. HighSpeedPC is the first official sponsor of project Lament and big thanks go out to them, the sponsored items include a Northbridge chipset block, a Fass-o-Matic blue LED kit and UV blue tubing. They also set me up with a discount code and I promptly ordered a flow meter and some Innova-protect fluid, HighSpeedPC = good people.
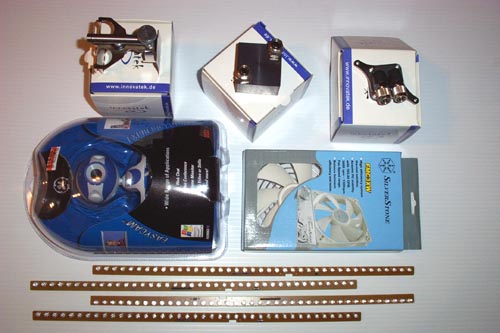
More parts shown below... I don't want to show all the secrets of this mod yet, but I will let you know that the CPU block and GPU block I ordered arrived as well as a rheostat controlled 120mm fan. Yes that is a webcam, this sucker needs to see, right? You may be wondering what the four strips at the bottom of the picture are, I don't want to give everything away but they are automotive LED brake lights with an amazing 40 LEDs per strip that will be incorporated into the mod... and that's all I have to say about that.
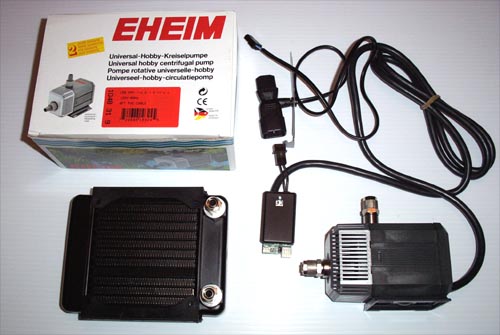
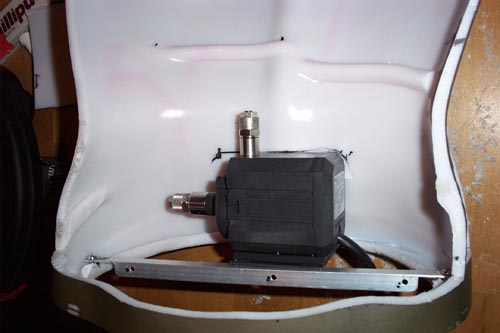
The Innova Radi-S radiator and the Eheim 1048 pump with the installed pump switch arrived, time to continue the mod...
01/02/2005 Update... The Final Cuts. The first thing I did was try to fit the pump at the bottom of the torso behind the mother board tray, it was just a hair too big and
The pump now fits like a glove into the cutout and will be attached to the Alum-angle for the MB tray and also to the base when I make it.
I also positioned and then cut a hole for the radiator, it lines up nicely with everything else and thankfully the torso is still structurally sound. With so many cuts made to the back I was afraid that the whole thing would collapse, I may still add some support later but at this point it is not necessary. I will need to make some attachment bars for the radiator, fill some gaps with Milliput and vinyl dye the torso... but I am wrapping things up for today. I still have to vacuum up all the plastic dust and bits off the dining room table and floor, God bless my understanding wife.
01/25/2005 Update... Pulling things together. I have to mention something about this mod, it keeps getting bigger because I keep getting new and better ideas as I go along... not necessarily a bad thing but if it is ever going to be finished I have to say enough. Having said that here is a picture of some more parts for the mod...
First up are some Viewsonic speakers, I figure if he has a monitor and a camera he may as well have speakers too. Continuing clockwise, the Laserpod... more on that later. On top of the speaker box is some 3/8" UV blue tubing and a 3/8" to 1/4" reducer and on the Laserpod box is 5' of 1/4" UV blue tubing, directly below that is a Danger Den fill port, some Innovatek anti kink springs, a tubing cutter and an Innovatek HDD cooler. I know I said a page or two back that the head was next, but I meant next after a couple of other things... Like the handle.
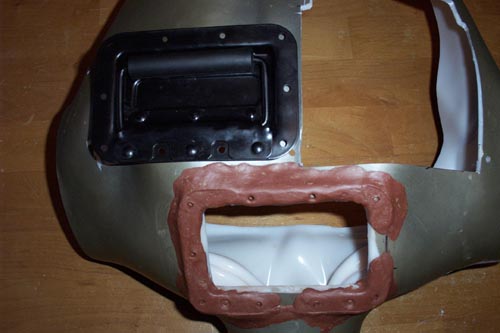
I outlined the handle cutout with terra-cotta Milliput and marked the holes for the bolts, polymer clay rocks. |
|
|