|
Projects | Guides | Gallery | Articles | Contact |

|
Tumbler Batmobile PC Work Log by batfan06
I've always liked cars and Batman so when the Batmobile came out in a 1/24th scale die cast, I had to have it. That started me thinking about a Batman computer mod, and I considered several options with windows, graphics, lights, etc., but it just wasn't really what I was looking for. About then the movie, Batman Begins came out and there was a cool new Batmobile. A couple of weeks after seeing Batman Begins I was walking through Wal-Mart and noticed a 1/6 scale RC model of the Tumbler Batmobile. I'd just finished a Hummer H2 mod using a 1/6 scale Hummer RC. Hmmm....what could be cooler than a computer modded Batmobile? I began measuring the Tumbler RC model and various computer parts and after many potential configurations, I settled in on a layout that looked like it would work. After Christmas, the Batmobile RC was marked down and I bought a brand new one to rip apart for my mod. I couldn't resist playing with it for a couple of days but it wasn't the coolest RC vehicle ever so it was easy to begin taking it apart. It took about a month and a half working in my spare time to build the Batmobile PC.
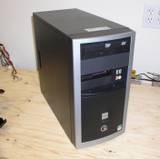
This is the computer I started out with. It's an AMD Sempron 2800+ with 40 gig HD, 736 megs of DDR 400 ram, and CD/DVD. I just use this computer for web surfing so the on-board video and Sempron processor are OK for that. This works out better as most video cards won't fit inside the Batmobile body.
|
|
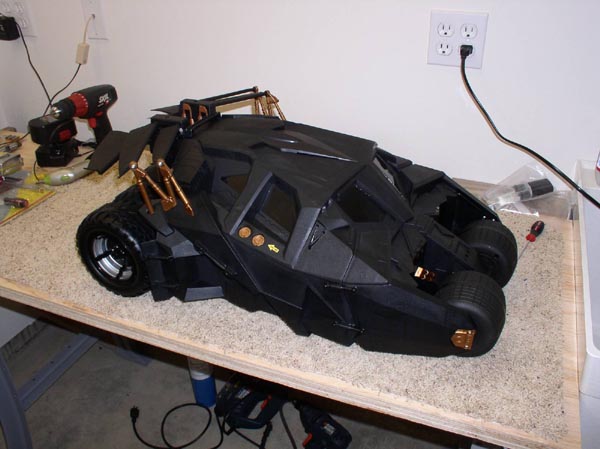 |
This is the 1/6 scale Batmobile RC that I bought at Wal-Mart. I had to cut the windows open for cooling. |
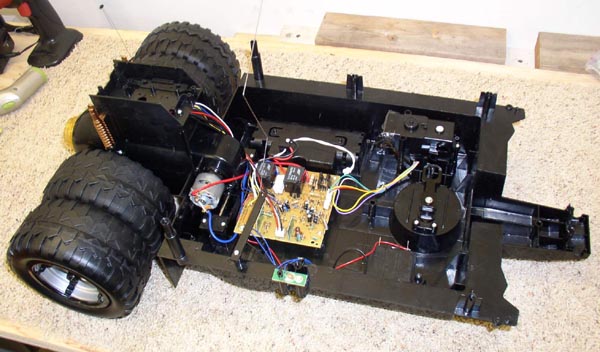 |
Here's a shot of the inside of the Batmobile before the RC gear was removed. |
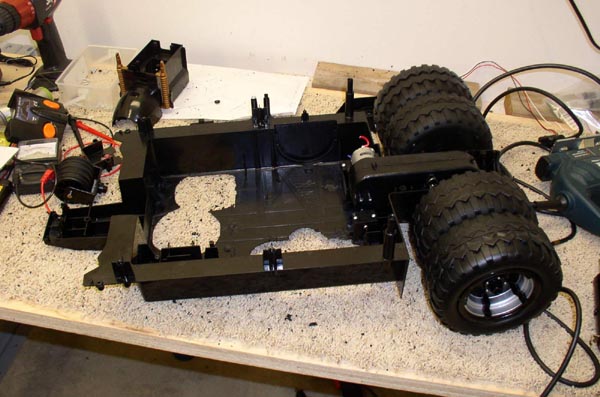 |
The Batmobile chassis with the RC gear removed and the bottom dremelled flat. |
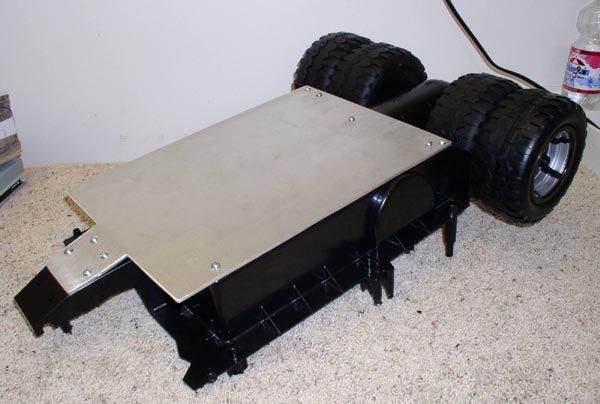 |
This is the aluminum reinforcement plate that strengthens the chassis enough to support the additional weight of the computer gear. |
 |
The computer parts are test fit in the chassis to make sure it all fits. |
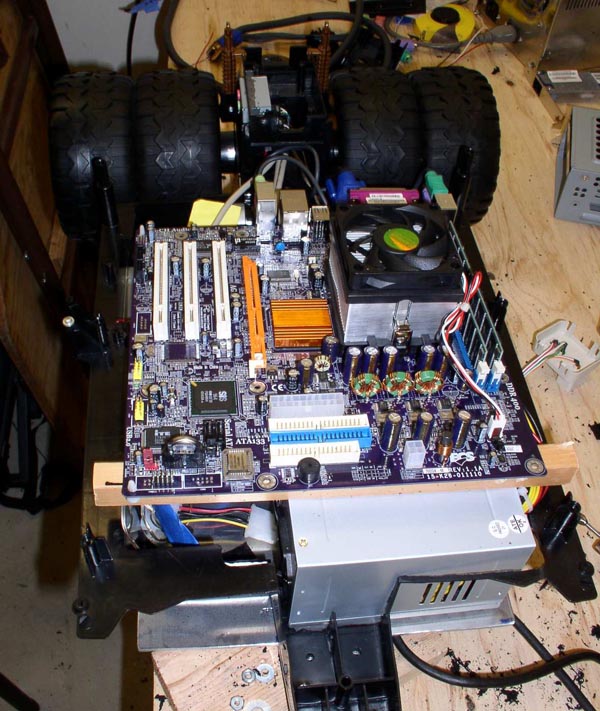 |
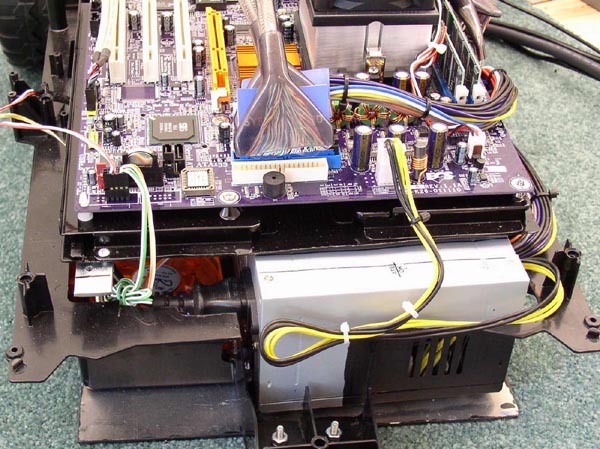
Front view of the test fit configuration showing the power supply on the lower level. The hard drive is also on the lower level, mounted under the motherboard, just above the dvd drive. |
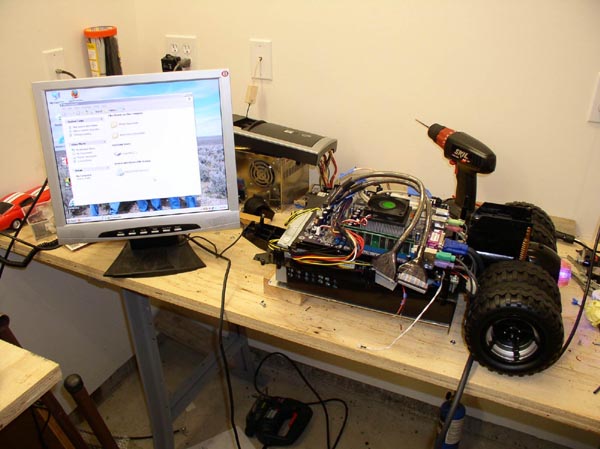 |
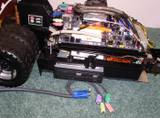
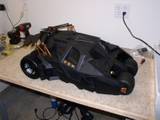
It's Alive! All the components are installed and happy. |
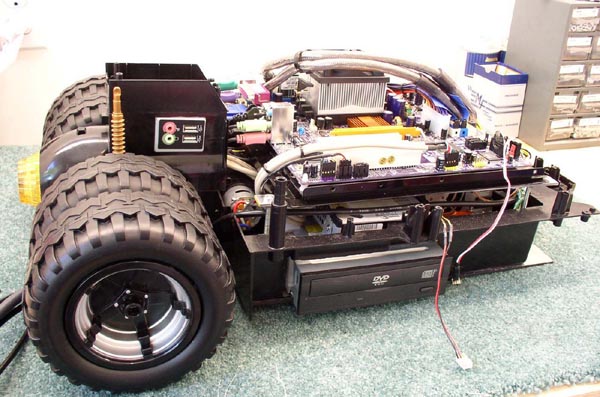 |
Right hand side view of the final configuration. Wire sticking out the side is for the remote DVD eject button. Notice the USB and Sound access toward the rear. These will be accessible from the outside when the Batmobile body is screwed to the chassis. |
 |
Left hand view of the final configuration. |
 |
Front view – notice that the power supply doesn't vent directly outside. There is an 80mm fan next to the vent that pulls the hot air down and out the bottom. |
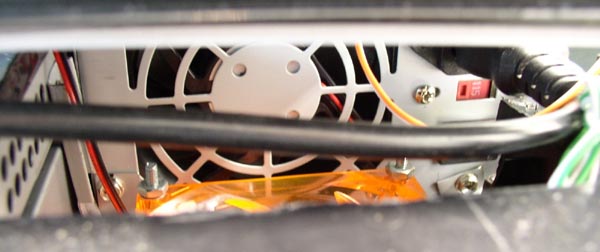 |
Close up of the power supply vent and exit fan. |
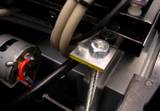 |
Motherboard tray mount using threaded rod and bar steel. This bolts to the aluminum chassis plate. |
 |
All the mobo connections are extended to the outside using a monitor extension cable (with PS2 and sound connections), a LAN extension and a USB extension. |
 |
This shows the other end of the monitor extension cable with PS2 and sound connections. |
 |
One of two small fans mounted in the back of the Batmobile body to pull in cool air. |
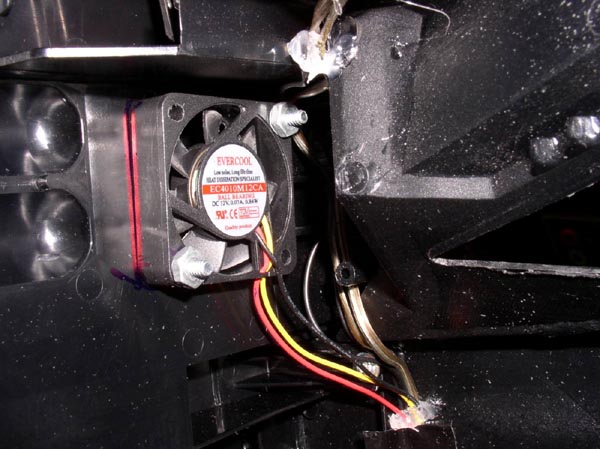 |
Inside view of one of the two cooling fans at the back of the Batmobile body. |
 |
Power button is mounted on the roof. It is “stealthed” because everybody wanted to press the red button. (See next 2 photos) |
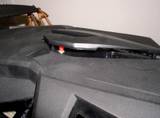 |
The top trim piece covers the power button. (see next photo) |
 |
Voila! Stealthed power button. |
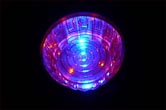 |
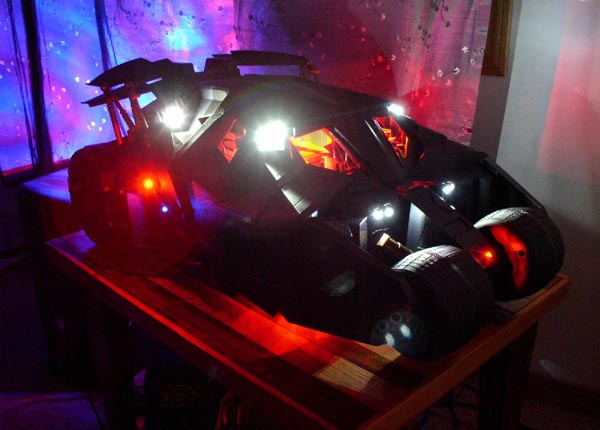
Jet exhaust LED lighting – (1) 10mm blue LED and (6) 3mm amber LEDs |
 |
3 additional 3mm red LEDs flash in jet exhaust when HD activity is indicated. There are a total of 7 HD activity LEDs on the Batmobile PC – (3) red in the jet exhaust, (2) blue-1 on each side and (2) red in front. This was accomplished using an opto-isolator. |
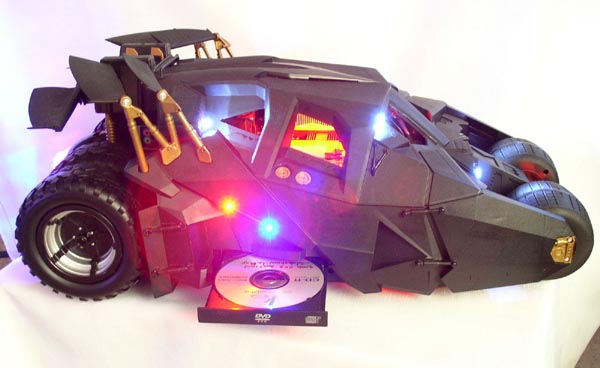 |
Side view of the Batmobile PC with DVD open. The left round bronze button above the DVD is the stealth DVD eject button. |
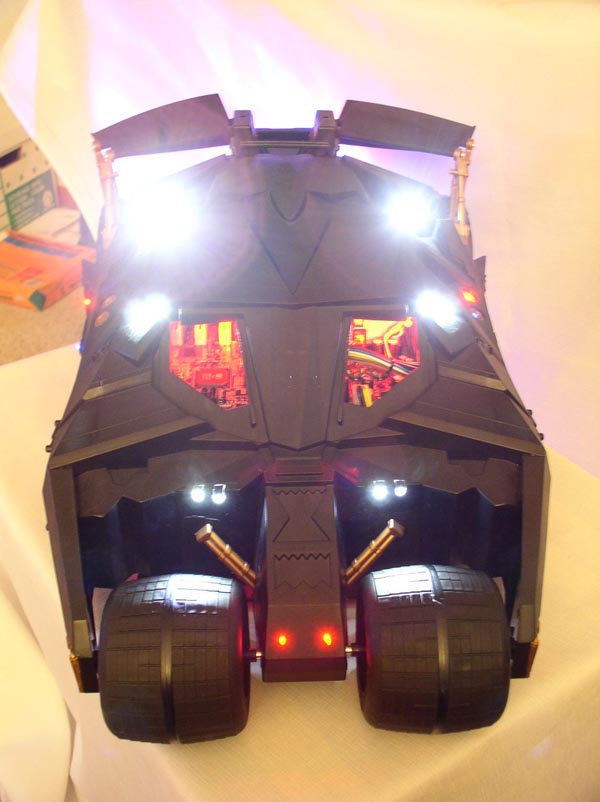 |
Front view: the two red LEDs in the front are hard drive activity lights. There are a total of ten white LED “headlights”. |
 |
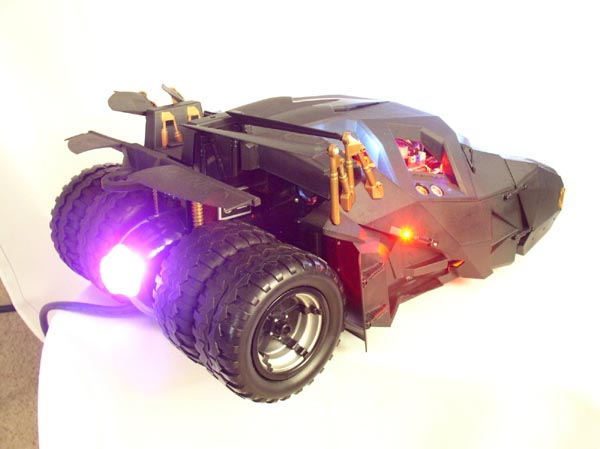
The red LED on the side is a power indicator. |
 |
If you look closely just under the spoilers you can see the USB and sound access ports. Just to the right of them is one of two small cooling fans in the back of the body. |
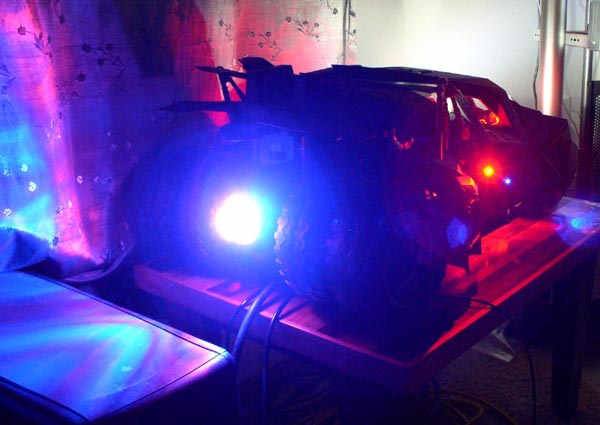 |
Dark rear “candy shot”. That blue 10mm LED and six amber 3mm LEDs really put out a lot of light, but what did you expect a jet exhaust to look like? |
 |
Dark “candy shot”. The red interior lighting is done with two red leds on each side. The red glow underneath is the 80mm exit fan with red LEDs. |
|
Disclaimer: This how-to guide is presented for informative purposes only. CaseModGod.com can not and will not be held responsible for damages to or resulting from anything that you may decide to do to your case or hardware and also can not and will not be held responsible for injury to your self or others as a result of attempting any of the things that are shown on this site. Basically you are responsible for your own actions whether said actions were based on information garnered from this site or elsewhere, learn to deal with it. |
|