|
The Project, Finished:(You may click on a picture to view a larger version)
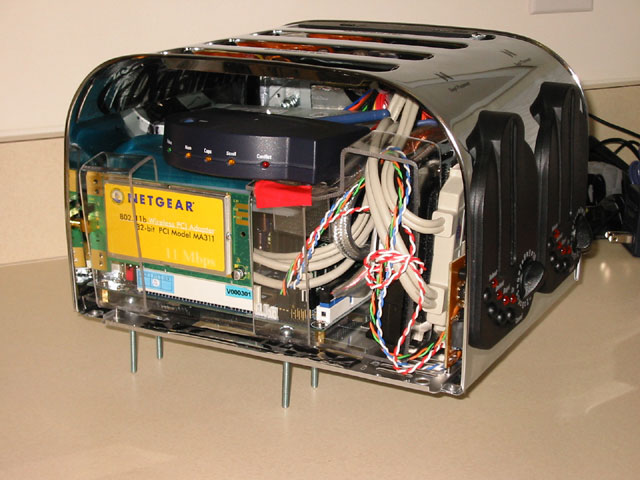
Whew! Everything fits!!!!! I did leave out a few steps, but they involved the installation of components shown on the previous pages, only the installation occurred inside the toaster instead of on the countertop. The only things left to do, are close up this side of the toaster, use my dremel tool to cut off the excess screws, and replace the base.
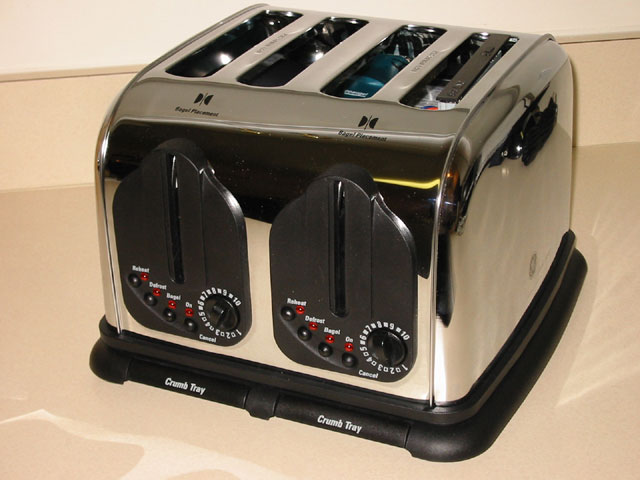
Here it is, all the components installed and the toaster put back together again.
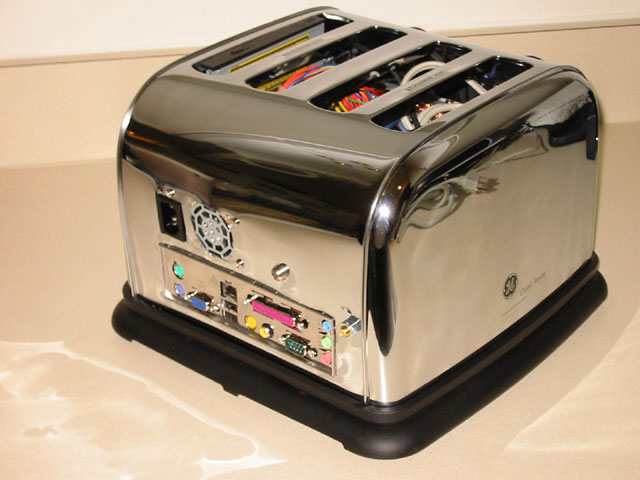
Here is the backside of the toaster with everything installed.
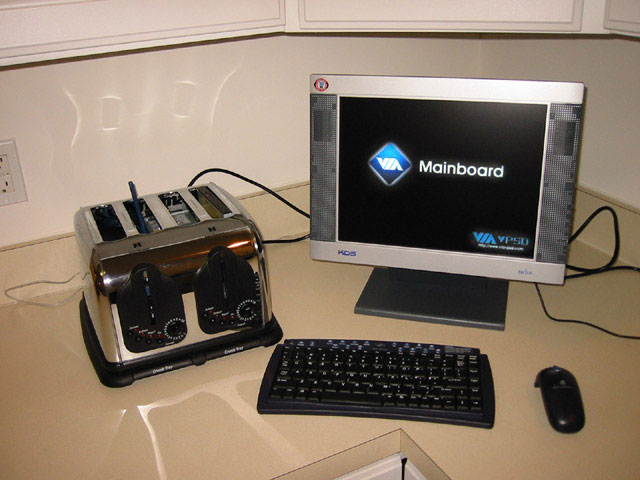
And here we are, the completed computer. You can see the antenna for the Gyration wireless keyboard and mouse sticking out of the top of the toaster. This antenna can go up and down when the computer is on or off. The monitor is wall mountable and will be mounted on a 1x4 that will swing down from under the cabinets. The monitor is in its final position, only it will swing down from the cabinet directly above it. By putting the keyboard and mouse in a drawer and swinging the monitor up when not in use, you will never know that there is a computer in the kitchen (just please do not put pop-tarts in it!). - Work log |
|
Disclaimer: This how-to guide is presented for informative purposes only. CaseModGod.com can not and will not be held responsible for damages to or resulting from anything that you may decide to do to your case or hardware. We also can not and will not be held responsible for injury to your self or others as a result of attempting any of the things that are shown on this site. Basically you are responsible for your own actions whether said actions were based on information garnered from this site or elsewhere, learn to deal with it. |