|
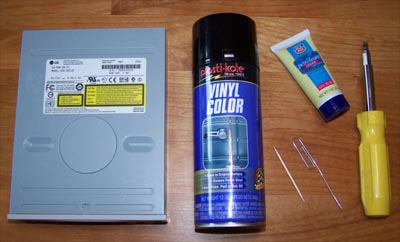
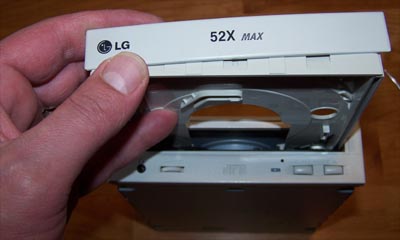
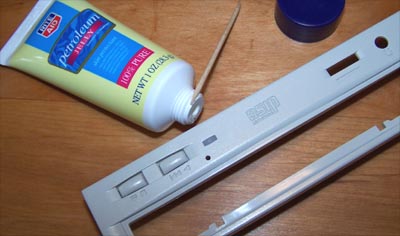
CD Bezel Disassembly and Vinyl Dying Guide This guide shows how to take apart a CD-ROM drives front bezel and how to go about changing your drive color from beige to black by using a can of spray vinyl color. Shown briefly in the $10 case make-over guide, this all new guide covers CD-ROM disassembly, preparation and spraying... so simple that there's no excuse to settle for beige drives. Below is the CD drive, a can of black Plasti-Kote vinyl color, toothpick, paper clip, petroleum jelly and a flathead screwdriver.
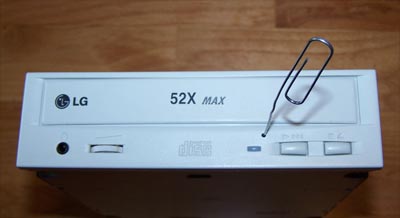
Locate the small hole on the drive face, take the paperclip and insert it into the hole as shown below.
Push the paper clip straight into the hole and the drive will eject, pull the tray open.
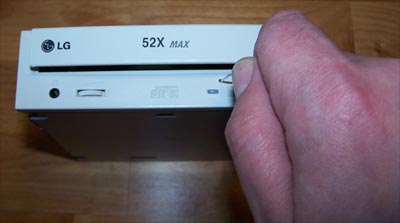
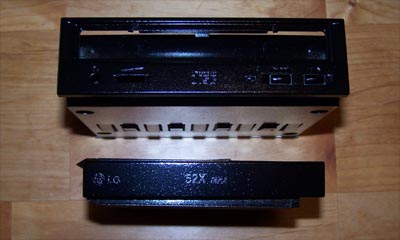
Turn the drive over and look at the bottom of the tray, the tray bezel almost always just pushes out at the bottom...
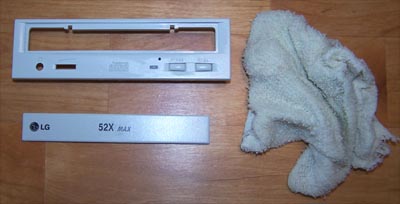
And it simply slides up and off as shown below... set the tray bezel aside.
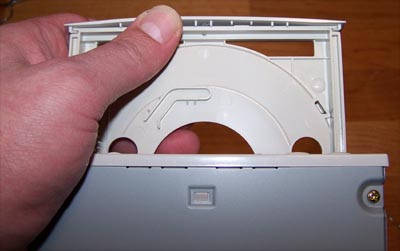
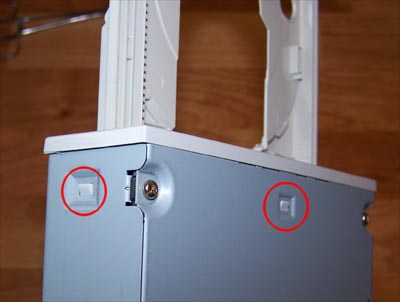
Locate the tabs that hold the drive bezel in place, below circled in red, not all drives have the exact same layout for the tabs, but the principle is the same on all drives and should be easy to figure out.
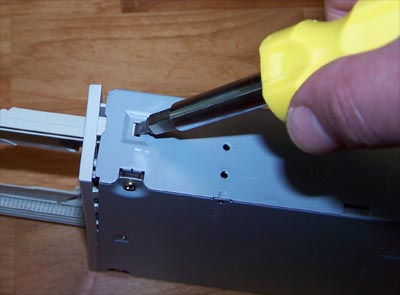
Using the screwdriver push the tabs in and gently pull the face plate out and away from the drive, once you get any two tabs out the third is easy.
Wash the drives with mild soap and water to remove any dirt or oils, allow to air dry completely.
Take the toothpick and dip the end into the petroleum jelly, carefully coat the clear plastic LED indicator taking care not to get any petroleum jelly on the bezel.
Time to spray... shake the can of vinyl dye like crazy and give the drive a light first coat, it only takes about ten minutes to set up enough that you can give it a more liberal second coat. Below shows the drive face wet after two coats, inspect your drive parts for light areas and give them a final touch up cover coat.
After the vinyl dye has completely cured take a cotton swab and wipe the petroleum jelly and vinyl dye off the plastic LED cover.
Before re-assembling the drive take a black Sharpie marker and color the volume wheel. Slide the face plate over the drive tray and lock the tabs back in place, slide the bezel back onto the tray and push it back in... super sweet.
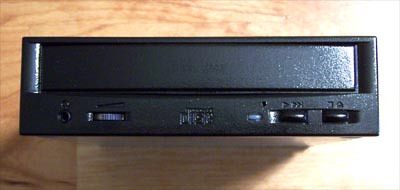
This mod is very simple and takes little time/effort to pull off, vinyl dye can also be used to color the entire case bezel as seen in the $10 case makeover guide and for most plastics I prefer it over paint. Vinyl dye is available at auto parts stores in a limited range of colors, but it doesn't crack, peel or scratch like paints, it's flexible and bonds with plastic rather than sitting on top like primer and paint. It also dries a lot faster than paint and is very forgiving if you spray a little too heavy, but it does stink to high hell... so use a respirator and make sure you are outside when spraying it. Happy Modding - Guide written by ARTbyTROY |
|
Disclaimer: This how-to guide is presented for informative purposes only. CaseModGod.com can not and will not be held responsible for damages to or resulting from anything that you may decide to do to your case or hardware and also can not and will not be held responsible for injury to your self or others as a result of attempting any of the things that are shown on this site. Basically you are responsible for your own actions whether said actions were based on information garnered from this site or elsewhere, learn to deal with it. |