|
6" LCD Mod Page 3... Below are the materials used in this part of the mod, almost all of the parts shown can be had at any ACE Hardware store. 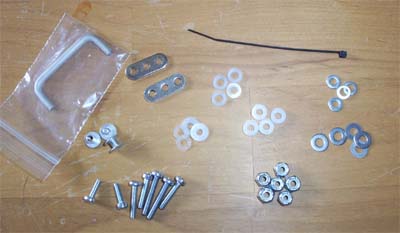
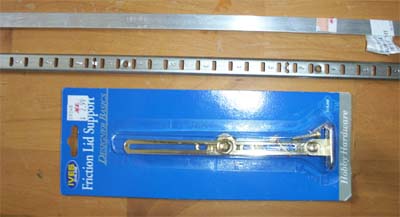
I used two friction lid supports as the slide bars for my LCD, they are the right length and work good. Take them both apart (you will need to drill through the hinged ends to get them off) because all we need are the bars and the plastic spacers.
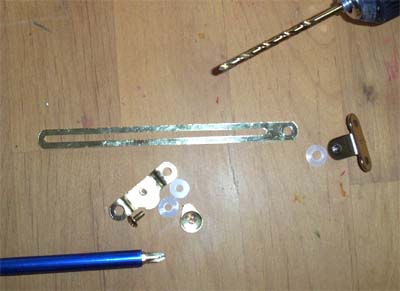
Below are the parts used and order of assembly for the slide bars, you will need to make two of them (mirrored). The rightmost metal piece in the picture is actually from the helping hands magnifier I used earlier to solder the power wires for the LCD, the holes in it had to be drilled out a little to make it work.
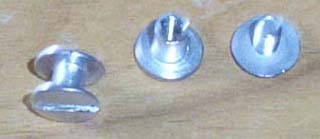
To attach everything to the slide bar I used two 1/4" aluminum screw posts.
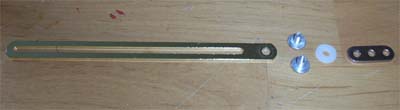
Below is a front on shot of the completed side tracks, in it you can see how your two finished slide bars should look.
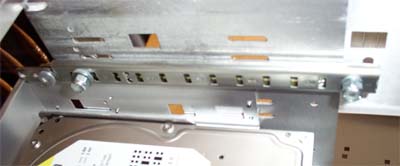
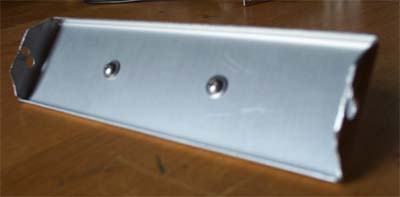
The side tracks measure 6 3/8" long and are made up of - 1/8"x1/2" Steelworks Alum-Flat, the slide bar assembly and lastly the shelf mounting strip. I cut the pieces of Alum-Flat and shelf mounting strip to size and filed the cut edges smooth, you can see in the picture below where I drilled the holes for the bolts and lock nuts, I put three washers stacked inside the track on the rear bolt so that the slide bar could move more freely inside. The tracks sit flush against the inside front edge of the case and flush with the top of the next bay device below it, position your tracks then mark and drill your holes into the case. Bolt it all together using a lock nut on the end, you might need a washer or spacer beneath the nut to cinch things up a bit, but do not over tighten. The shelf mounting strip has rectangular holes evenly spaced running the entirety of its length, by looking at the picture below you should have no problem figuring it all out.
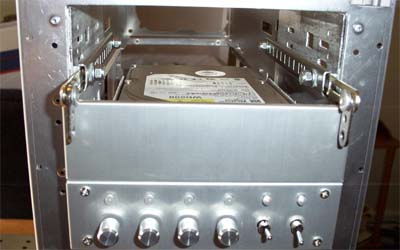
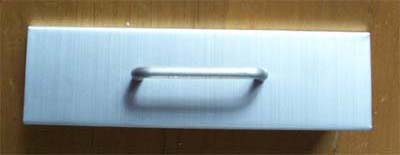
Now that the tracks and slide bars are finished and installed it's time to mod a 5.25" bay cover, it will not only help make things look stealthed when closed but will add needed structural support to the screen assembly. I first cut down the sides of the 5.25" blank, then I angled the edges and filed it all smooth. I lined everything up for a test fit - LCD, rails and bay cover, then marked and drilled a hole in each side.
I also checked to make sure that the screw heads from the handle would not interfere with the screen bottom sitting flush with the bay cover. I bought the 2" aluminum handle for fifty cents from All Electronics Corp (they rock) and it matches the case very well. Since it fit without problems sitting perfectly centered on the bay cover I drilled two holes and screwed it down.
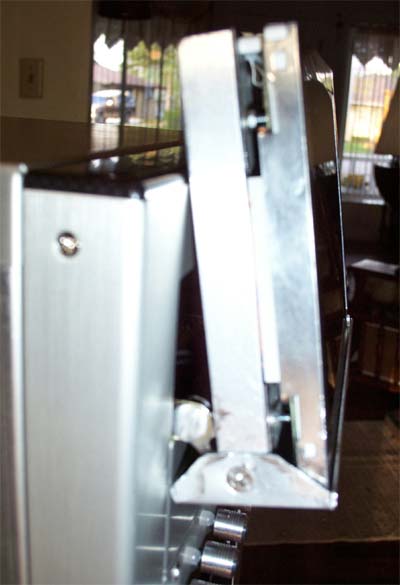
I used an angled flat head bolt, spacer and lock nut to hold the bay cover to the slide bars and LCD rails. It is important to bend the edges of the bay cover a little so that it can slide in easier, I wound up having to file mine down a little on the sides because it was just too tight. The following picture, though blurry, tells the story.
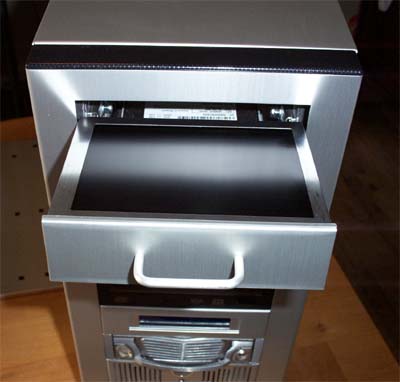
It goes in and comes out pretty smooth, but the screen looks a little rough around the edges, and there is also the scratch I mentioned earlier.
If you decide to do this mod make sure you also order either the headrest or visor mounting kit with your LCD screen, it costs around $8 USD and is worth every penny. I will be using the visor mount kit for mine, but either will work.
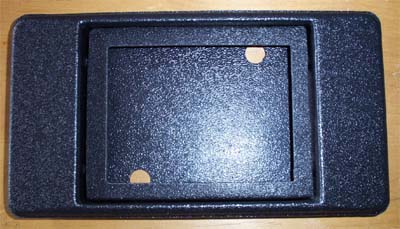
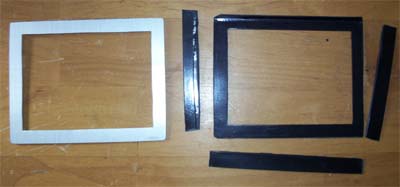
I had initially dremeled and filed an aluminum faceplate for my LCD out of the scrap from my side window cutout (shown on the left) and though it looks pretty good by itself when I placed it on top of the screen my every cutting imperfection showed... bad. I ended up ditching the aluminum faceplate idea and cutting all but the top edge off of the interior piece of the visor mount kit and then filed the outer edges to fit... much cleaner.
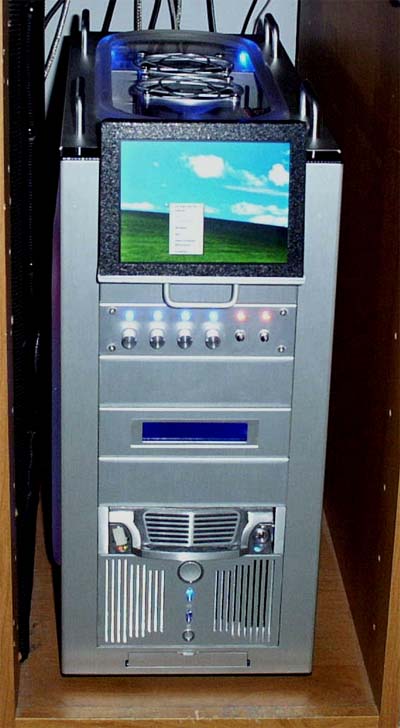
I used a thin double sided tape to hold the plastic screen face down onto the face of the LCD and it looks a lot better than the one I had hand cut, at the bottom it slides into the small gap between the bay cover and screen. The picture below is not an entirely fair representation of the screen in action, at 640x480 the text in the box is entirely legible, the picture does show the screens ability to perform as a secondary desktop, sweet.
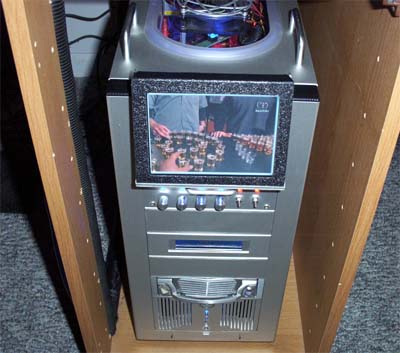
And a gratuitous picture showing the LCD running off my TV tuner card and functioning as a TV... which is awesome for Nascar races, when a killer crash happens two clicks sends the TV image to my primary 21" monitor, super sweet.
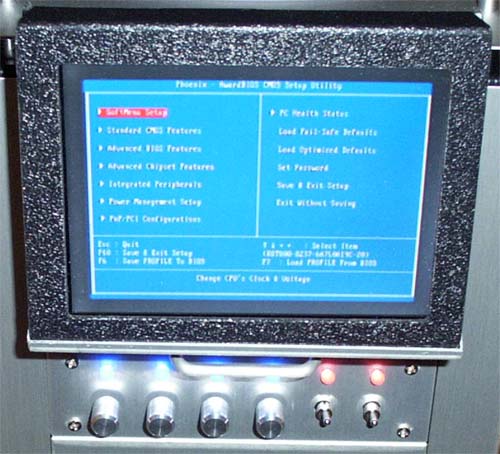
I can even fine tune the system bios from the 6" LCD, which rocks.
This mod is sweet, if you understand the above instruction set you owe it to yourself to build one. I am not trying to sell anyone on using the same 6" TFT LCD that I use, but I think you'll have a hard time finding anything that looks as nice or works as well for the price. Here are the key points from the Parts Express 6" LCD description... *Back light: Built-in CCFL - Some LCD modules I've seen elsewhere do not include a backlight unit. *Screen format: 4:3 - 4:3 resolution is the same as that of an NTSC television which is equal to a 640x480 computer resolution. *Dot format: 320 W x 234 H - The resolution that looks best on the Parts Express 6" LCD is 640x480, which is about what you get when you double the dot format of 320x234. *Viewing angle: Top, 65º/Bottom, 45º/ Left to Right, 45º - View angle is one of the most important things to look for, what good is a case mounted monitor if you can only see it when looking directly straight into it. *Operating voltage: DC 9V - 24V / *Power consumption: 1A. - "Also included is an auto switch circuitry that turns the monitor on when a video signal is present."... It's almost like they were made for modding and computer use . I have had a lot of
people email me asking how the 6" LCD screen connects to the computer, it
connects by RCA composite video and the plug end from the LCD is female. The LCD
plugs into your video card or motherboards on-board video - if it has S-video or
RCA out - and is recognized by the PC as an NTSC TV. - Guide written by ARTbyTROY |
|
Disclaimer: This how-to guide is presented for informative purposes only. CaseModGod.com can not and will not be held responsible for damages to or resulting from anything that you may decide to do to your case or hardware and also can not and will not be held responsible for injury to your self or others as a result of attempting any of the things that are shown on this site. Basically you are responsible for your own actions whether said actions were based on information garnered from this site or elsewhere, learn to deal with it. |